Friday, March 14, 2014
|
Labels:
a,
broken,
exhaust,
flange,
how,
manifold,
repair,
to
|
|
Exhaust manifolds work in very punishing conditions. They conduct exhaust gasses with core temperatures that top 1,000 degrees F from the engine to the exhaust pipes. Many stock and aftermarket manifolds enhance engine performance by improving scavenging and flow dynamics of the exhaust gasses as they exit the engine head. Most manifolds are made of cast iron and cannot be welded. Any repairs involving additional metal must be done by brazing with an oxy-acetylene torch and iron brazing rods.
Instructions
1 Clean the manifold and the broken off flange well. Be certain the parts are free of rust and carbon. Nest the flange back into position to make sure it will mate properly and be in the original plane. Clamp the broken flange with Vise-Grips at the edge furthest from the joint.
2 Heat the joint with a torch while holding the flange in place. Apply heat until the native metal begins to melt and puddle. Begin feeding the iron brazing rod into the puddle as the puddle begins to form. Move the torch focal point and the rod along the joint with a steady and slow motion, constantly melting the native metal and replacing it with the rod material. Braze as much as possible before stopping to flip the manifold to can gain access to the other side. Continue this process until the entire joint has been brazed.
3 Cool the repaired area slowly. Hold the torch back a little from the actual brazing distance and wash the flame over the repair and the surrounding area. Increase the distance of the torch gradually as the general area heats up and the repair cools, slowly pulling it back to apply less and less heat to the area while washing over a slowly-increasing area. This will slowly cool the manifold in a consistent pattern to avoid causing new stress cracks due to the thermo-dynamic expansion rate of the manifold material.
4 Begin removing the torch, then replace it in ever-increasing intervals once the torch has been worked back to about 18 inches from the area and the metal has lost all glow and has dropped in temperature so that the heat may be removed entirely.
5 File away any protruding brazing material from the mating face of the manifold. Hold the file flat and in plane with the side of the flange that did not break off. Judge the flatness of the repaired piece with the unbroken side. Remove material from the repaired flange if necessary to achieve flatness.
Saturday, December 7, 2013
|
Labels:
a,
balancer,
bolt,
broken,
easyout,
get,
harmonic,
how,
of,
out,
to,
with
|
|

A broken harmonic balancer bolt can cost a lot of money to have professionally removed from the threaded hole in which it is stuck. An EasyOut can help you remove the broken section of the bolt without the hassle of bringing your vehicle to a mechanic. Special care needs to be taken to make sure you do not damage the threads in the harmonic balancer or break off the hardened EasyOut inside the bolt. A broken EasyOut requires a professional machinist to remove both the broken bolt and EasyOut.
Instructions
1 Spray penetrating oil on the end of the broken bolt. Allow the penetrating oil to soak in around the bolt for five to six hours.
2 Align the tip of a center punch with the center of the broken bolt. Hit the center punch with a hammer to make a depression on the end of the broken bolt.
3 Secure a 1/8-inch left-hand drill bit in the chuck of a drill motor. Drill a hole at least 1/2-inch deep in the end of the bolt, using the center punch depression as a guide to hold the drill bit in place. Exchange the 1/8-inch drill bit for the drill bit recommended by an EasyOut set for the size of the broken bolt. Enlarge the hole with the larger drill bit.
4 Set the squared end of the recommended EasyOut into the tee-handle wrench supplied with the set. Tighten the handle of the wrench to hold the EasyOut in place.
5 Place the tapered end of the EasyOut in the drilled hole running through the center of the broken bolt. Turn the tee-handle wrench counterclockwise to force the EasyOut into the hole. Continue turning the wrench until the broken section of the bolt backs out of the threaded hole.
Thursday, November 14, 2013
|
Labels:
a,
broken,
of,
piston,
ring,
signs
|
|

An engines piston rings will help keep the engines compression where it should be and prevent oil from going into the cylinders. Piston rings can wear out from the use of poor-quality gasoline, which leads to carbon deposits or engine knock, as well as from the engine overheating.
Broken or worn-out piston rings will lead the engine to burn oil by allowing the oil to leak into the cylinders. If you determine that your vehicles engine needs oil more often than normal, it could indicate worn-out piston rings. Check the cars undercarriage to find out whether you have an oil leak, which could also explain your engines constant need for oil.
As the engines oil leaks into the cylinders and burns along with the fuel, the vehicles exhaust system will then take the burned oil in the form of smoke all the way through the vehicles tailpipe. When a vehicle first starts up in colder weather, the exhaust will appear white at first. Constant white or gray exhaust---no matter the temperature outdoors nor how long you drive your car---could indicate worn-out piston rings.
Worn-out piston rings will affect the overall performance of your vehicles engine and emissions system. Worn piston rings not only leak oil---they allow air to pass through, affecting the engines overall compression. A lower engine compression will lead to a decrease in power as well as fuel efficiency. The introduction of burnt oil into the emissions system will also increase the amount of pollutants exiting the vehicles tailpipe, possibly leading to it failing an emissions test.
|
Labels:
a,
broken,
how,
keyhole,
open,
to,
trunk,
with
|
|
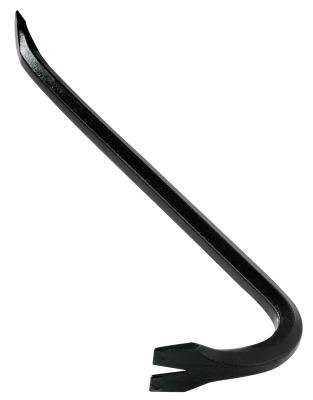
If you can no longer insert your key into the keyhole of your broken car trunk, the only way you can open the lock is to drill a hole in the cylinder. Since you need to replace the entire lock once the keyhole is broken, drilling the cylinder does not do any additional damage to your lock or trunk. A screwdriver or crowbar will help you open the trunk itself if you cannot open it by hand once you drill through the lock.
Instructions
1 Position the end of the drill bit in the keyhole of your trunk lock. Drill all the way through the lock.
2 Turn the reverse switch of the drill to reverse position and press the drill trigger to get the bit out of the lock mechanism. Try to open the trunk door. Insert a screwdriver into the space below the lock and between the trunk door and the rear bumper and pry the trunk open if you cannot open it by hand. Insert the flat end of a crowbar into the space and carefully pry upward against the bumper if the screwdriver does not work. Be careful not to dent the bumper.
3 Position a 2-to-3-foot metal beam between the floor of the trunk and the bottom of the trunk door so that it holds the door open while you clear out the trunk. Have a new lock put in and the latch repaired professionally as soon as possible.
Monday, September 30, 2013
|
Labels:
a,
broken,
can,
drive,
i,
strut,
with
|
|

A strut is a suspension component that dampens an automobiles movements and prevents it from bouncing on its springs. Struts are often expensive to replace, but driving on a broken strut is not a good idea.
When a strut is broken, one area of the vehicle is free to move farther and faster than the others. This increases the wear on the other suspension components and may cause the failure of these components. Damage to other suspension components may greatly increase the cost of needed repairs.
The increased movements allowed by the broken strut may also increase the strain on the steering system and cause it to become damaged. Also, suspension and steering system components are typically mounted close to each other. When a strut breaks, the strut itself may strike and damage steering components.
The suspension system is responsible for keeping the wheels in contact with the road, this is especially important on rough road surfaces and during emergency braking. Without a properly operating strut, the vehicle will tend to bounce, causing a wheel to not properly contact the road. This can cause a driver to lose control of the vehicle.


