Showing posts with label i. Show all posts

How do I Change a Drive Belt on a UK Mercruiser Engine

Wednesday, May 7, 2014 | Labels: , , , , , , , , , , | 0 comments |

The UK Mercruiser engine is a marine engine that comes in sizes ranging from 3.0 to 5.7 and bigger. The front engine accessories on the Mercruiser engine are controlled by a drive belt. When the engine is running, the drive belt is driven around each engine accessory by the crankshaft pulley on the bottom of the engine. Excessive use and heat exposure can cause the belt to weaken. Once the belt weakens, it can fray or crack. Change the belt out at the first sign of any damage to prevent the engine from shutting down.

Instructions

    1

    Unbolt the cover from the top of the UK Mercruiser engine with a ratchet and a socket. Pull the cover off so that the front of the engine can be accessed.

    2

    Locate the alternator on the front right hand side of the engine. Loosen the alternator mounting bolts with a ratchet and a socket. The alternator has a slide bracket attached to the top of the alternator that tensions the drive belt.

    3

    Loosen the bolt in the center of the slide bracket with the ratchet and a socket. Turn the adjustment bolt that is located on the end of the slide bracket counter-clockwise with the ratchet and socket until the belt tension is loose.

    4

    Pull the belt off of all of the engine accessory pulleys. Place the belt to the side. Slide the new drive belt around the alternator pulley first and then around the water pump pulley, power steering pump pulley and the crankshaft pulley. The belt will only fit in one direction around the engine accessories so there is no need for a routing diagram.

    5

    Turn the adjustment bolt on the alternator slide bracket clockwise to tighten the belt. Once the belt is tight, push in on the belt with your hand. The belt should have no more than a half-inch of free play. If so, continue to tighten the belt until there is only about a half-inch of free play in the belt. Tighten the bolt in the center of the slide bracket down tight with the ratchet and socket. Tighten the alternator mounting bolts down tight with the ratchet and socket.

    6

    Crank the UK Mercruiser engine for about fifteen seconds and then shut the engine back off. Recheck the tension of the belt. Adjust the tension if needed and reinstall the cover over the engine.

Continue reading...

How Often Should I Check My Rear Differential Fluid

Saturday, April 12, 2014 | Labels: , , , , , , , , | 0 comments |
How Often Should I Check My Rear Differential Fluid?

    Proper lubrication of the differential gears will even extend the life of your drive-wheel tires.
    Proper lubrication of the differential gears will even extend the life of your drive-wheel tires.

Routine Fluid Checks and Preventative Maintenance

    The differential allows the drive wheels in your 2WD or 4WD car, truck or SUV to turn at different speeds. Proper lubrication of the gears is imperative for the safe and optimum performance of your vehicle. Checking the rear differential fluid every 15,000 miles for a "gummy" consistency will prevent costly repairs and can even extend the life of your drive-wheel tires.

Todays Vehicles Are Designed for Low Maintenance

    Todays automobiles last longer. Technology has given them more sophisticated engineering, cleaner-burning fluids and low-maintenance designs. Frequently checking the differential fluid is unnecessary because of these advances. Checking the fluid during 30,000- and 60,000-mile maintenance visits is more than adequate--with a complete fluid change at 90,000 miles.

Bottom Line

    While preventative maintenance is the key to the life of your vehicle, you can avoid spending unnecessary time by simply checking the fluid during each oil change. If you have an older vehicle that is used for towing heavy loads long distances, checking the fluid every 15,000 miles or so is recommended. If you are driving a newer vehicle--one that is five years old or less--a check of the fluid during 30,000- and 60,000-mile maintenance visits will suffice.

Continue reading...

How do I remove a BMW 320I Driveline

| Labels: , , , , , , , | 0 comments |

The BMW 320I was the base six-cylinder model of the 3 Series cars. The 3 Series were based on the rear-wheel drive E36 platform and were made from 1991 to 1998. The driveline is the axle that transfers power from the transmission to the rear differential. The axle uses continuous velocity joints to allow the rear axle to float on its suspension and move independently of the transmission. If the axle becomes warped or damaged then it needs to be removed for replacement. Do not attempt to repair the axle, because the torque will shatter any weld you make.

Instructions

    1

    Park the 320 somewhere flat and out of traffic. Make sure the emergency brake is pulled before you turn the car off. Jack up all the front end, and then lower the front end onto jack stands. Then, jack up the rear end, and support it on jack stands, as well.

    2

    Go underneath the 320 and find the driveline. Look for a metal tube that runs between the transmission rear and the rear differential. The tube will have two rubber boots over the continuous velocity joints. The metal flange on the bottom of the boots is what anchors the driveline to the other powertrain components.

    3

    Slide the car jack under the car and jack it up so it touches the transmission side of the driveline. Then, unbolt the six bolts that secure the driveline to the transmission. Do not lay directly under the driveline in case it falls off the car jack. It is heavier than it looks. Lower that end of the driveline down with the car jack and then go to the differential side.

    4

    Raise the car jack up so that it supports the differential end of the driveline. Then unbolt he six bolts that secure the driveline to the rear differential. Use the car jack to lower the driveline down. Pull the driveline out from under the 320. You can lower the 320 off the stands at this point but it will not be drivable until the driveline is replaced. You can push the car around if you disengage the emergency brake, though.

Continue reading...

Why Should I Turn Rotors

Thursday, March 27, 2014 | Labels: , , , , | 0 comments |
Why Should I Turn Rotors?

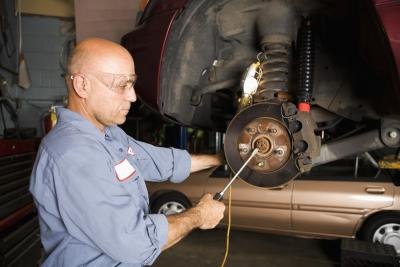
Turning a brake rotor is a process in which a machinist smoothes the surfaces of the rotor that is contacted by the brake pads. Consumers should understand when a brake rotor can and cannot be turned, as well as the advantages of turning the rotors.

When Rotors Cant Be Turned

    Brake rotors should only be turned when the rotor can be smoothed but stay within manufacturers specifications. Most brake rotors will have the minimum thickness measurement stamped into the rotor. The information is also available in service manuals. Rotors with deep cracks should be replaced and not turned.

When Rotors Need Turning

    Rotors do not need to be turned on a regular basis, but only when the rotor is showing signs of damage. Brake pads that were not replaced in a timely manner may cut deep grooves into the surface of a rotor. The rotor may also wear unevenly, resulting in a wavy surface. Brake rotors may also corrode, leaving the surface rough. All of these problems can be corrected by turning a rotor.

Advantages of Turned Rotors

    The primary reason to turn rotors is to save money, as turning a rotor is less expensive than replacing it. Properly turned rotors will have a smooth surface that will improve braking distance, reduce brake noise and vibration, and increase brake pad life.

Continue reading...

How Do I Repair AISI 4140 Shaft Material With Welding

Sunday, March 16, 2014 | Labels: , , , , , , , , , | 0 comments |
How Do I Repair AISI 4140 Shaft Material With Welding?

Welding hard steel, such as 4140 steel, is a complicated process that involves heating levels that are unusual to achieve in a home workshop. However, in the right shop, it is possible. You will need a good oven and good welding skills to accomplish this task, but as long as you have the right facilities, it will not be a complicated procedure. AISI ers to the American Iron and Steel Institute and its industry-accepted steel standards; AISI 4140 is a versatile alloy steel used in many industrial applications, including plating and shafts, and is easily weldable with traditional methods.

Instructions

    1

    Heat the damaged steel to about 1,250 degrees Fahrenheit.

    2

    Match weld material to 4140 metal, including a minimum of 1.25 percent manganese, 1.75 percent nickel, 0.3 percent chromium and 0.25 percent molybdemum. If repairing a crack, this filler metal should be lower in carbon than AISI 4140, which has up to 40 percent carbon content, to prevent development of a brittle layer called martensite and possible future cracks.

    3

    Use softer filler metal in building up a shaft for re-machining, followed by a harder layer. This buffer layer should be very low in carbon content to prevent carbon from leaching into the hard-facing layer, one of several specialized alloys, causing it to crack quickly. The hard-facing layer should be thin, as thicker layers will, counterintuitively, fail faster than thinner layers. Preheating, as mentioned above, is vital to prevent distortion and failure of the hard facing, which will lead to rapid erosion of the buffer layer.

    4

    Cool the steel very gradually by placing an insulated welding blanket over the bar or by burying it in sand. Rapid cooling will cause the layers to distort and spoil the job. The piece should not cool more than 150 degrees Fahrenheit per hour; for large parts, this may require a temperature-controlled furnace to cool the part precisely.

Continue reading...

How Do I Jump Start a BMW 1100 LT

Saturday, March 15, 2014 | Labels: , , , , , , , , | 0 comments |
How Do I Jump Start a BMW 1100 LT?

The BMW K 1100 LT motorcycle was manufactured in the early 90s by the German automobile company BMW. Like a car, this motorcycle required a battery to provide electricity to start the engine. Although not recommended by the manufacturer, the battery of the BMW K 1100 LT can be jumped using a car should the battery die. When jumping the battery, extreme care should be exercised as incorrectly jumping the battery could damage the motorcycles electrical system.

Instructions

    1

    Position the motorcycle near the front end of the car. Ensure that the vehicle and the motorcycle are not touching in any way. Turn off both the vehicle and the motorcycle, and remove the keys from the ignition.

    2

    Open the hood of the vehicle and remove the seat of the BMW K 1100 LT to expose the batteries.

    3

    Connect the jumper cable with the red handle to the positive terminal on the vehicles battery. Connect the other red jumper cable to the positive terminal on the motorcycles battery. Take great care to ensure that the positive terminal does not touch any other metal on the motorcycle.

    4

    Connect the other jumper cable to the negative terminal on the vehicles battery. Hook the other end of the jumper cable to a metal area of the motorcycle, such as the rear axle nut. Do not mistake chrome for metal.

    5

    Turn on the motorcycle, but do not turn on the vehicle as doing so could destroy the motorcycles electrical system. Remove the jumper cables in the reverse order that they were installed.

Continue reading...

How Do I Troubleshoot the ABS in a Chevy Light Pickup

Saturday, March 1, 2014 | Labels: , , , , , , , , , , | 0 comments |
How Do I Troubleshoot the ABS in a Chevy Light Pickup

The anti-lock braking system (ABS) in your Chevy light pickup truck helps to prevent your wheels from locking up when you slam on the brakes. This gives you some control during an emergency braking maneuver, regardless of the road conditions. Sometimes this system may malfunction, and you will know this by the ABS light showing up on your instrument panel. You can troubleshoot the problem yourself before doing the repairs yourself or taking it to a mechanic.

Instructions

    1

    Locate the fuse panel cover under the steering column on the dashboard. Open the cover by pulling down on it from the top.

    2

    Look for the fuse puller inside the fuse panel and remove it. Read the diagram on the bottom part of the fuse panel cover to locate the ABS fuse. Use the fuse puller to remove this fuse.

    3

    Examine the fuse to see if it has blown. You can tell if it has blown by looking at the wire inside the fuse which will be severed. If this is the case, replace it with a new fuse of the same amperage.

    4

    Insert the key into the ignition and start the engine. If the ABS light stays lit on the instrument panel, then you probably have a malfunction in the ABS. Have the vehicle towed to a qualified mechanic or do the repairs yourself if you know how. Do not drive the vehicle until it has been repaired.

Continue reading...

How Do I Replace the Oxygen Sensor in a 1995 Voyager Van

Sunday, February 16, 2014 | Labels: , , , , , , , , , , , | 0 comments |

The 1995 Plymouth Voyager van uses an oxygen sensor to monitor the levels of oxygen in the exhaust. The sensors reading tells the Voyagers engine computer how to modify the air/fuel mixture for maximum fuel efficiency and minimal pollution. A failing sensor will illuminate the "Check Engine" light on the Voyagers instrument panel; it will also cause the Voyager to idle poorly and to use more fuel than necessary. To avoid wasting money on extra fuel, replace the sensor when it goes bad. Its a job you can do yourself with just a little bit of patience and tool familiarity. Purchase replacement Voyager oxygen sensors from an auto parts store.

Instructions

    1

    Start the engine on your 1995 Voyager and let it idle until it reaches the normal operating temperature, the temperature your van typically runs at. Locate the oxygen sensor threaded into the exhaust manifold at the bottom of the engine compartment.

    2

    Unplug the wiring harness connection on the sensor. Remove the sensor from the manifold with a wrench.

    3

    Insert the new sensor by hand to prevent cross-threading. Torque the sensor to 20 pound-feet, using a torque wrench. Plug the electrical connection in until the connector clicks.

Continue reading...

How do I Troubleshoot a 1994 Chrysler LHS

Tuesday, February 11, 2014 | Labels: , , , , , , , | 0 comments |
How do I Troubleshoot a 1994 Chrysler LHS?

The 1994 Chrysler LHS is a four-door sedan with a 3.5-liter, V6 engine. If you are having trouble with your Chrysler LHS, there are a couple of things that you should check before you take it to a repair shop. Common problems such as a dead battery, empty fuel tank and a low fuel system can be fixed without invasive repair to the vehicle. You dont have to be a Chrysler technician to get your LHS back on the road; you can do it yourself.

Instructions

    1

    Open the driver side door to gain access to the ignition. Put your key into the ignition and turn it halfway to engage the instrument panel. Look over the gauges on the instrument panel to make sure that you have enough gas in the fuel tank. Fill the fuel tank as needed. If the instrument panel will not light up, check the battery.

    2

    Open the hood from the hood latch under the steering wheel of the car. Raise the hood and engage the hood rod to keep the hood up. Check the connections to the battery. The battery housing is on the right side of the engine block. Tighten the connection nuts with a pair of pliers. Try to restart the car.

    3

    Test the battery if the car still wont start. Place the testing leads of a voltmeter to the battery terminals. If you get a reading of less than 11 volts, connect a battery charger to the battery. Connect the red and black leads from the battery charger to the red and black terminals on the battery. Plug the battery charger into an electrical outlet. Leave the charger on for 12 hours. If the car wont start after 12 hours, replace the battery.

    4

    Check the cooling system on the left side of the engine if the LHS is overheating. Unscrew the coolant tank cap by turning it counterclockwise. Fill the coolant tank with 50/50 coolant until it reaches the fill line on the left side of the tank.

    5

    Jack up the front end of the car and crawl under the car. Locate a small, black box on the right side of the engine block. This is the starter. Have a friend try to start the car and then listen to the starter. If you hear a "buzzing" noise from the starter, have a certified technician replace the unit.

Continue reading...

How do I Read the Codes on a 1993 Mazda 626

Sunday, February 2, 2014 | Labels: , , , , , , , , , , | 0 comments |
How do I Read the Codes on a 1993 Mazda 626?

You can read the trouble codes on your 93 Mazda 626 right from your home garage, saving your time and money. The On-Board Diagnostics II computer (OBDII) comes standard on the Mazda 626. This computer receives trouble codes from sensors positioned throughout the vehicle that monitor all of the cars functions. When it receives a trouble code, it alerts you by illuminating a warning or service light on the vehicles instrument panel. When you see one of these lights, you can read the codes using an OBDII scanner to pinpoint the problem.

Instructions

    1

    Put the key into the ignition and turn it to the "II" position. Dont start the engine.

    2

    Look for an open port on the lower drivers-side dashboard, near the steering column. Plug the scanner into the port. The vehicles electrical system will power on the OBDII scanner. Wait for the codes to appear on the scanner.

    3

    Write down the codes on a piece of paper and look them up in the booklet that came with the scanner. The numerical codes will be translated into descriptions.

    4

    Unplug the scanner and turn off the vehicle. Take the codes and descriptions to your mechanic to have your vehicle serviced or repaired.

Continue reading...

How Can I Tell If My Catalytic Converter Is Bad

Friday, January 31, 2014 | Labels: , , , , , , , , , | 0 comments |
How Can I Tell If My Catalytic Converter Is Bad?

A catalytic converter greatly reduces the amount of emissions that your vehicle produces. However, when this part has gone bad it can mean trouble for your vehicle as well as the environment. Certain clues will help you determine whether your catalytic converter is failing.

Driveability

    Your ability to drive your vehicle normally will be affected if the catalytic converter is bad. The speed and the power of a vehicle will fall below their normal performance levels. If your vehicle starts to have trouble with stalling, this could be a sign of bad catalytic converter.

Emissions

    A rise in vehicle hydrocarbons and carbon monoxide emissions is a sure sign that a catalytic converter has gone bad. An exhaust analyzer, which costs $3,000 to $5,000, can inform you whether the converter is bad by reading the emissions levels as they exit the exhaust pipe.

Exhaust

    The color of the smoke coming from your exhaust is another way to determine whether a catalytic converter is bad. Blue smoke indicates that the converter might be contaminated with phosphorus, which is found in motor oil. White smoke usually indicates that coolant is leaking internally.

Continue reading...

How do I Make a Non California Vehicle Smog Compliant

Thursday, December 19, 2013 | Labels: , , , , , , , , , | 0 comments |
How do I Make a Non-California Vehicle Smog Compliant?

Officially, only a certified smog inspection station can tell you if your vehicle is smog compliant in California. When you bring an out-of-state vehicle into California, a certified technician can let you know what repairs or adjustments must be done for your vehicle to meet the requirements. If you plan to register your car in California, it must meet the minimum smog-control requirements or fall under one of the categories for exemption. Owners of vehicles that are 6 or less model years old pay a smog abatement fee in lieu of getting their vehicles tested.

Instructions

    1

    Visit the California Bureau of Automotive Repair website at bar.ca.gov. Click on "Find a Station" in the left margin. Click on "Current Active Smog Stations." Enter your ZIP code to find stations near you. Check that the station you select is in the same county in which you plan to register your vehicle; different counties may have different regulations.

    2

    Contact the smog inspection station directly to confirm it is state certified and to make an appointment. These organizations are private and not regulated by the government, so contact several stations to find the best price.

    3

    Bring your vehicle to the station and say it needs a smog inspection to be sure it complies with California requirements. The test should take no longer than an hour. The technician will provide you with a certificate, or inform you if the car needs repairs or adjustments to meet the minimum certification requirements. If your car needs repairs, the same station can generally do them. Register your car within 90 days; the certificate is invalid after that time.

Continue reading...

How Do I Know If My Axle Is Breaking in My Car

Thursday, December 12, 2013 | Labels: , , , , , , , , , , | 0 comments |
How Do I Know If My Axle Is Breaking in My Car?

The axles in your car are complex parts that are necessary for the wheels to move effectively. If they stop working completely, it can be very dangerous for anyone in the car. Luckily, when an axle is not working properly, it makes a distinctive sound that you can periodically test for. Set aside time every few months to check the axles.

Instructions

Checking the Car for a Broken or Cracked Axle

    1

    Eliminate all sounds from the car. Turn off the radio and keep conversation to a minimum. You will be listening closely for noises and need full concentration.

    2

    Start the car. Turn the engine on and put the car into drive.

    3

    Turn the steering wheel all the way to the left. Slowly drive forward with the steering wheel still turned and listen for a clicking noise.

    4

    Turn steering wheel all the way to the right and drive forward listening for a clicking noise. If you heard even the faintest clicking noise on either side, your axles are probably in need of repair.

    5

    Park the car and examine the axles for cracks or grease. If the axles, which are located inside the wheels, are cracked or covered in grease, it is very likely your axles need to be replaced.

Continue reading...

How Do I Install 9006 HID Lights

Saturday, December 7, 2013 | Labels: , , , , , , | 0 comments |
How Do I Install 9006 HID Lights?

If you want a simple aftermarket do-it-yourself project to perform on your vehicle, then installing some HID headlights may be the perfect choice. Not only will this give your automobile a fresh, European look; it will also provide you with headlights that are more effective and efficient. HID headlights work with a small ballast that regulates the flow of electricity, allowing them to burn brighter longer. To perform this task youll only need a couple of basic hand tools and about half an hour.

Instructions

    1

    Park your vehicle in an area that is well lit and level. Turn off the engine and let it cool for up to half an hour. Then pull the release latch to pop the hood. Go directly behind the headlight assembly to locate the access panel.

    2

    Remove the access panel or dust cover. This is usually held on by a couple of clips or small screws. Once off, you should see the wiring harness connected to the headlight assembly. Squeeze the base of the plug and pull it free from the headlight.

    3

    Reach into the headlight assembly and grasp the actual bulb. Give it a quarter turn to the left and remove it. Insert the 9006 HID replacement bulb and turn it to the right to lock it in place.

    4

    Attach the ballast to the back of the headlight assembly with the double sided tape that comes in the HID kit, then plug the wiring harness into the ballast. There will be a connecting wire in the kit that connects the ballast to the headlight. This way the ballast acts as a middle man between the autos electrical system and the headlight.

    5

    Replace the access panel and close hood.

Continue reading...

How Do I Change a PCV Valve on a 2007 Jeep Liberty

Wednesday, November 27, 2013 | Labels: , , , , , , , , , , | 0 comments |

The Positive Crankcase Ventilation (PCV) valve prevents vapors from leaking from your 2007 Jeep Libertys engine into the atmosphere. The PCV valve forces harmful vapors back into the combustion chambers, so that they burn off during the fuel combustion cycle. When your Libertys "check engine" light comes on, or when your vehicle fails an emissions test, the PCV valve most likely has failed. Buy a replacement valve from an auto parts store.

Instructions

    1

    Raise the hood of your Liberty and rest it on the prop rod. Locate the PCV valve protruding from the back of the left cylinder head.

    2

    Pull the rubber hose straight back off the end of the PCV valve. Unscrew the PCV valve from the mounting area, by hand. Discard the old valve. Thread the replacement PCV valve into the mounting area, by hand, until it is secure.

    3

    Push the rubber hose back onto the end of the new valve. Push the hose back until it stops, making sure it is tight. Close the hood of the Liberty.

Continue reading...

How do I Replace the Rotors on a 2002 Toyota 4Runner

Wednesday, November 20, 2013 | Labels: , , , , , , , , , , | 0 comments |
How do I Replace the Rotors on a 2002 Toyota 4Runner?

The rotors are arguably the most important of all of the components of the 2002 Toyota 4Runners brake assembly. The rotors provide the platform on which the brake pads rely to slow and eventually stop the vehicle. Damaged rotors will compromise the effectiveness of the brakes, leading to uncontrolled braking and possibly brake failure. Inspect the rotors regularly for scoring and other damage to catch any repair or replacement needs as soon as possible.

Instructions

    1

    Park the 4Runner on a flat surface and turn the engine off. Open the hood and remove the master cylinder cap located on the right side of the engine, near the back of the engine compartment. Remove 1/3 of the brake fluid from the reservoir with a turkey baster. Place a shop rag over the containers opening.

    2

    Place tire blocks in front of the front tires. Loosen the lug nuts on the rear wheels with the 17-mm socket and breaker bar. Place the jack under the frame in the back of the vehicle and lift the rear wheels off the ground. Rest the rear axles onto jack stands and remove the jack. Remove the lug nuts and take the back wheels/tires off.

    3

    Remove the caliper slide bolts on the right rear caliper with the 14-mm wrench. Lift the caliper from the caliper bracket and suspend it above the brake assembly with a wire coat hanger or bungee cord. Remove the brake pads from the caliper bracket by hand. Each of the two pads will slide from the caliper bracket slots on either side of the right rear brake rotor.

    4

    Remove the caliper bracket bolts with the 16-mm wrench. Lift the bracket from the rotor and set it aside.

    5

    Tap the center section of the rotor with a dead-blow hammer to loosen the grip of rust on the back side of the rotor. Grab the rotor on both sides and pull it straight from the wheel hub.

    6

    Spray brake parts cleaner on the wheel hub and clean the area with a wire brush to remove rust and other debris. Clean the new brake rotors thoroughly with brake cleaner and a cloth towel.

    7

    Place the new rotor on the wheel bolts with the raised center section facing out. Replace the caliper bracket on the rotor and screw in the caliper bolts. Slide the new brake pads into the bracket slots on either side of the rotor.

    8

    Place the C-clamp over the caliper piston and the back side of the rear caliper. Squeeze the piston into the side of the caliper. Remove the clamp after the piston has been forced completely inside the caliper wall. Place the caliper over the bracket and the new brake pads. Screw in the caliper slide bolts and tighten them with the 14-mm wrench.

    9

    Move to the opposite side of the 4Runner and replace the left rotor and brake pads (follow Steps 3 through 8). Place the wheels back on the Toyotas rear wheel bolts and screw on the lug nuts by hand. Lift the rear-end of the 4Runner with the jack and remove the jack stands. Lower the rear tires to the ground and tighten the lugs with the socket and breaker bar. Return to the drivers seat.

    10

    Start the Toyotas engine and press the brake pedal repeatedly until the pedal response returns to normal. Move to the engine compartment with a funnel and brake fluid. Remove the shop rag and place the funnel inside the reservoir. Fill the master cylinder with brake fluid. Remove the funnel and replace the master cylinder cap. Close the Toyotas hood.

Continue reading...

How do I Reset Ingersol Air Compressor After E Stop

Monday, November 4, 2013 | Labels: , , , , , , , , , | 0 comments |

In 1871, the Ingersoll Rand Co. started producing industrial tools and power equipment. Today, the company offers industrial equipment, climate control systems, security solutions, home products and power tools. Ingersoll Rand air compressors utilize safety systems to prevent personal injury and equipment damage. The "Emergency Stop" function on an Ingersoll Rand air compressor allows the operator to quickly shut down the system in an emergency. You need to reset the air compressor after engaging the "E-Stop" button before using the equipment again.

Instructions

    1

    Examine the control panel for the air compressor and locate the circular "EMEG STOP" button.

    2

    Rotate the "EMEG STOP" button clockwise.

    3

    Press the "RESET" button located on the control panel twice. After resetting the system, press the "Start" button to engage the air compressor.

Continue reading...

How Do I Replace the Side Mirror on My 1994 GMC Sonoma

Sunday, October 27, 2013 | Labels: , , , , , , , , , , , | 0 comments |
How Do I Replace the Side Mirror on My 1994 GMC Sonoma?

Like many GM vehicles, the 1994 GMC Sonoma requires the removal of the interior door panel to replace the side view mirror. This task might intimidate many people but its not overly complicated. As a matter of fact, the first time a would-be home mechanic tries this and realizes how uncomplicated it is, he may desire to step up to bigger challenges. Replacing the side view mirrors on the Sonoma is less complicated than learning how to use them to back the truck up.

Instructions

    1

    Roll the window down all the way on the door with the mirror that needs replacing. If the Sonoma has power windows, turn the ignition to the "Off" position and remove the key from the ignition once the window is down.

    2

    Align the window crank removal tool (manual windows only) behind the length of the window crank. Pry the tool in between the crank and the door panel to unseat the retaining clip. The clip snaps over the internal section of the crank and will pop off with a slight spring force. Be careful not to let it fly off and get lost. Pull the window crank off its shaft once the spring is off.

    3

    Remove the two screws in the door pull cup with the Phillips screwdriver.

    4

    Pry the outside edge of the door panel (between the panel and the door frame) away from the frame with the trim panel pry tool. Work the pry tool to the bottom of the door panel and then to the other side to unseat all the plastic internal fasteners.

    5

    Push the door panel upward slightly to unseat the lip of the panel secured to the ridge of the door/window frame.

    6

    Disconnect the wire harness located on the inside of the door panel and then remove the door panel.

    7

    Disconnect the wire harness for the side view mirror (power mirrors only).

    8

    Remove the three retaining nuts attached the the side mirror studs with a ratchet and socket. Brace the mirror with one hand when removing the last nut, so the mirror does not fall and scratch the paint on the door.

    9

    Feed the wire harness (power mirrors only) through the access hole in the door frame to remove the mirror and harness from the Sonoma. For manual mirrors, simply remove the mirror.

    10

    Install the replacement mirror (manual or power) by reversing the removal procedure and then reinstall the door panel by reversing the removal procedure.

Continue reading...

How do I Tow a Box Trailer With a 1999 F 150 5 4L

Thursday, October 10, 2013 | Labels: , , , , , , , , , , , , | 0 comments |
How do I Tow a Box Trailer With a 1999 F-150 5.4L?

Your 1999 Ford F-150, a sturdy vehicle with a 5.4-liter engine, can tow a trailer on camping trips or other vacations -- or when you simply want to move the trailer. The F-150 comes equipped with a towing ball, which allows you to attach cable to the trailers towing hitch. Once youve made the connection, drive the speed limit and avoid sharp or sudden turns in your Ford F-150.

Instructions

    1

    Drive your F-150 to a point in front of the box trailer where you can attach the tow ball and hitch.

    2

    Place the F-150 in park, and engage your emergency brake.

    3

    Exit the truck, and walk to the tow ball. Wrap the cable in place around the tow ball, and clamp it shut so it stays in place. Test the connection to ensure it wont come undone easily.

    4

    Tie the other end of the cable to the tow hitch of the box trailer, taking special care to clamp it in place to stabilize it.

    5

    Turn on the hazard lights of your box trailer if it has them, which will alert drivers of other vehicles to take caution when driving behind you and your trailer.

Continue reading...

How Do I Replace the Head Gasket on a Pontiac Grand Am V6

Saturday, October 5, 2013 | Labels: , , , , , , , , , , , , | 0 comments |

The Grand Am was the name for five different generations of cars under the Pontiac brand. The last generation of the Grand Am was a compact car that was in production from 1999 to 2005. One of the engines available for the Pontiac Grand Am was a 3.4-liter V-6 with a cylinder head on each side of the engine. The procedure for replacing the cylinder head gasket is different for each cylinder head.

Instructions

Left Cylinder Head Gasket

    1

    Remove the negative battery cable with a socket wrench in order to avoid the discharge of fuel while replacing the cylinder head gasket. Remove the cap from the fuel tank to relieve the pressure in the fuel tank.

    2

    Wrap a shop rag around the port connection on the fuel rail, and attach a fuel pressure gauge to the port connection. Place the bleed hose on the fuel pressure gauge into a container approved for gasoline, and open the valve on the pressure gauge. Allow the excess fuel to drain into the container, and empty the remaining fuel in the fuel pressure gauge into the container. Replace the filler cap on the fuel tank.

    3

    Drain engine oil from the crankcase into a clean container, and store it for later use. Drain the coolant from the radiator into a clean container, and store it for later use.

    4

    Disconnect the air cleaner assembly and throttle body from the upper intake manifold with a socket wrench. Remove the crossover pipe and its heat shield from the left exhaust manifold. Detach the electrical wiring from the spark plugs, and remove the covers from the rocker arms. Disconnect the upper and lower intake manifolds from the engine.

    5

    Remove the left exhaust manifold with a socket wrench. Detach the tube for the oil level indicator from the left cylinder head. Disconnect the rocker arms and push rods from the left cylinder head. Remove the mounting bolts from the left cylinder head with a socket wrench. Lift the left cylinder head from the engine block, and remove the gasket from the engine block.

    6

    Place a new gasket on the engine block, and mount the cylinder head on top of the gasket. Fasten the mounting bolts to the left cylinder head, and tighten them to to 33 foot-pounds with a torque wrench. Tighten the mounting bolts another 90 degrees with a socket wrench.

    7

    Perform steps four and five in reverse sequence to install the remaining components. Tighten the mounting bolts for the rocker arms to 89 inch-pounds with a torque wrench, then tighten them another 30 degrees. Tighten the mounting bolts for the lower intake manifold to 115 inch-pounds, and tighten the bolts for the upper intake manifold to 18 foot-pounds.

    8

    Tighten the bolts for the rocker arm covers to 89 inch-pounds, and tighten the retaining nuts for the left exhaust manifold to 12 foot-pounds. Tighten the bolts for the exhaust crossover pipe to 18 foot-pounds, and tighten the bolts for the heat shield on the crossover pipe to 89 inch-pounds.

    9

    Connect the cable for the negative battery cable with a socket wrench. Fill the radiator with coolant, and fill the crankcase with oil. Start the engine and check for fluid leaks.

Right Cylinder Head Gasket

    10

    Remove the negative battery cable with a socket wrench in order to avoid the discharge of fuel while replacing the cylinder head gasket. Remove the cap from the fuel tank to relieve the pressure in the fuel tank.

    11

    Wrap a shop rag around the port connection on the fuel rail, and attach a fuel pressure gauge to the port connection. Place the bleed hose on the fuel pressure gauge into a container approved for gasoline, and open the valve on the pressure gauge. Allow the excess fuel to drain into the container, and empty the remaining fuel in the fuel pressure gauge into the container. Replace the filler cap on the fuel tank.

    12

    Drain engine oil from the crankcase into a clean container, and store it for later use. Drain the coolant from the radiator into a clean container, and store it for later use.

    13

    Disconnect the air cleaner assembly and throttle body from the upper intake manifold with a socket wrench. Remove the crossover pipe and its head shield from the right exhaust manifold. Disconnect the electrical connector for the oxygen sensor. Detach the electrical wiring from the spark plugs, and remove the covers from the rocker arms. Disconnect the upper and lower intake manifolds from the engine.

    14

    Remove the right exhaust pipe from the right exhaust manifold. Disconnect the right exhaust manifold from the engine. Disconnect the rocker arms and push rods from the left cylinder head. Remove the mounting bolts from the right cylinder head with a socket wrench. Lift the right cylinder head from the engine block, and remove the gasket from the engine block.

    15

    Place a new gasket on the engine block, and mount the cylinder head on top of the gasket. Fasten the mounting bolts to the left cylinder head, and tighten them to to 33 foot-pounds with a torque wrench. Tighten the mounting bolts another 90 degrees with a socket wrench.

    16

    Perform steps four and five in reverse sequence to install the remaining components. Tighten the mounting bolts for the rocker arms to 89 inch-pounds with a torque wrench, then tighten them another 30 degrees. Tighten the mounting bolts for the lower intake manifold to 115 inch-pounds, and tighten the bolts for the upper intake manifold to 18 foot-pounds.

    17

    Tighten the bolts for the rocker arm covers to 89 inch-pounds, and tighten the retaining nuts for the left exhaust manifold to 12 foot-pounds. Tighten the bolts for the exhaust crossover pipe to 18 foot-pounds, and tighten the bolts for the heat shield on the crossover pipe to 89 inch-pounds.

    18

    Connect the cable for the negative battery cable with a socket wrench. Fill the radiator with coolant, and fill the crankcase with oil. Start the engine and check for fluid leaks.

Continue reading...