Tuesday, March 11, 2014
|
Labels:
a,
dyna,
glide,
harley,
how,
mount,
on,
to,
trunk,
wide
|
|

Harley-Davidson does not sell a trunk, or Tour-Pak, for any Dyna. Harley Tour-Paks and other trunks can be modified to fit any Dyna with a flat luggage rack that is at least 8 inches wide by 8 inches long. Unfortunately, the standard luggage rack for an FXDWG measures about 9 inches by 5 inches and is curved to accent the Wide Glides bobtail rear fender. The well known aftermarket supplier, Corbin Motorcycle Seats, does sell a 55-liter trunk that mounts on both Dyna Super Glides and Wide glides. It has two liters less volume than a Harley Chopped Tour-Pak and about 20 liters less than Harleys King Tour-Pak. The Corbin "Streamliner Trunkbox" is a simple mount.
Instructions
1 Protect your rear fender finish with shop rags before you begin installing the Trunkbox mount.
2 Immobilize the right rear fender rail hex nut inside your rear fender with a box wrench. Loosen and remove the rear fender rail bolt with a socket wrench and socket.
3 Repeat for the right front rear fender rail nuts and bolt. Remove the left fender rail nuts and bolts the same way you removed the hardware on the right side of the bike. Clean and save all hardware.
4 Apply thread locker to each fender rail bolt. Arrange each half of the Trunkbox mount so the two holes in the sides of each half of the adapter bracket align with the fender rail bolt holes.
5 Reinstall all fender rail nuts, washers and bolts through the holes in the Trunkbox adapter bracket halves. Tighten all fasteners wrench tight. Remove rags.
6 Arrange the trunk so the six holes in the trunk align with the six holes on the tops of the two adapter bracket halves. Apply thread locker to the threads of the button head mounting screws included with the trunk and mounting kit.
7 Push each of the button head mounting screws through the holes in the adapter brackets and the trunk so the button side is down. Fasten each screw to the trunk with the nuts and washers included with the kit using small box wrenches.
Thursday, November 21, 2013
|
Labels:
1995,
a,
brake,
civic,
honda,
how,
in,
light,
replace,
the,
to,
trunk
|
|
Everyone knows that brake lights are extremely important features of a vehicle. Theyre there to keep ourselves and other drivers safe, and when brake lights burn out or get damaged, its imperative that we replace them as soon as possible. Replacing the trunk brake light on a 1995 Honda Civic wont take you long, and all you will need for the job is a screwdriver and a new bulb.
Instructions
1 Open the trunk. Disconnect the electrical wires from the hold-down clip by sliding them out toward the center of the vehicle.
2 Detach the two screws from the bulb holder using a Phillips screwdriver. Remove the bulb holder from the brake light assembly.
3 Verify which bulb needs to be replaced by having someone press the brake pedal while you look at the lights.
4 Push the bulb gently into the housing and turn it counterclockwise until it comes loose.
5 Insert the new bulb into the socket by pressing it in slightly and turning it clockwise until it locks into place. Test the new bulb before moving to the next step.
6 Reinstall the bulb holder assembly and reattach it with the two screws. Tighten the screws using a Phillips screwdriver. Place the wires back in their original location in the hold-down clip. Close the trunk.
Thursday, November 14, 2013
|
Labels:
a,
broken,
how,
keyhole,
open,
to,
trunk,
with
|
|
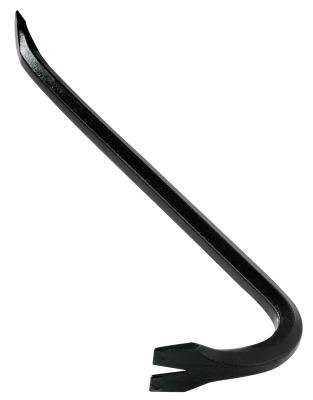
If you can no longer insert your key into the keyhole of your broken car trunk, the only way you can open the lock is to drill a hole in the cylinder. Since you need to replace the entire lock once the keyhole is broken, drilling the cylinder does not do any additional damage to your lock or trunk. A screwdriver or crowbar will help you open the trunk itself if you cannot open it by hand once you drill through the lock.
Instructions
1 Position the end of the drill bit in the keyhole of your trunk lock. Drill all the way through the lock.
2 Turn the reverse switch of the drill to reverse position and press the drill trigger to get the bit out of the lock mechanism. Try to open the trunk door. Insert a screwdriver into the space below the lock and between the trunk door and the rear bumper and pry the trunk open if you cannot open it by hand. Insert the flat end of a crowbar into the space and carefully pry upward against the bumper if the screwdriver does not work. Be careful not to dent the bumper.
3 Position a 2-to-3-foot metal beam between the floor of the trunk and the bottom of the trunk door so that it holds the door open while you clear out the trunk. Have a new lock put in and the latch repaired professionally as soon as possible.
Thursday, October 31, 2013
|
Labels:
a,
align,
how,
lid,
to,
trunk
|
|

Aligning a cars trunk may seem like a trivial part of car maintenance but it is essential to prevent rust. If a trunk is not properly aligned, the seals around the edges will not sit properly and water may pool on the sides or even inside of the trunk. To properly align your trunk, you will need a pair of calipers and a wrench set. It is also helpful to have an assistant hold the trunk while you measure it and make adjustments.
Instructions
1 Turn off the car. Pop open the trunk by pulling on the trunk release button inside the cab of your car.
2 Pull the trunk lid halfway up, and then have your assistant hold onto it while you reach inside the trunk and loosen the bolts on the supporting arms. There will be four bolts--two on each side. Do not remove the bolts--merely loosen them, because all you will be doing is changing the position by millimeters. There is a degree of play within the bolt holes because of the clearance between the bolt hole walls and the bolts themselves. Loosening the bolts will allow you to shift the bolts within the bolt holes.
3 Lower the trunk lid, but do not let it engage the trunk latch. Have your assistant keep supporting it. Place calipers on the right side seam and measure the gap. Write this number down so you dont forget it. Measure the seam on the left side and compare the two numbers. They should be the same. If they are not, have your assistant shift the trunk lid until the numbers are the same.
4 Measure the gaps at the front and back of each side, to ensure that the trunk lid is not slanted to one side or another. When it is properly aligned, have your assistant stay perfectly still. Access the inside of the trunk by folding the rear seats down and crawling inside the trunk. Tighten the left outer bolts and then the right inner bolt until they are snug but not tight--you are just trying to keep the lid in place for now. Tighten the bottom left bolt and then the right top bolt until they are all the way down, and then go back and tighten the first bolts all the way down.
5 Crawl out of the trunk, fold the seats back up and have your assistant close the trunk.


