Showing posts with label service. Show all posts

Tips on Taking a Duramax to GM for Service

Wednesday, May 7, 2014 | Labels: , , , , , , , , | 0 comments |

Vehicle manufacturers often recommend that their vehicles be taken back to the dealership for service and parts, in order to make certain all work is done properly and in accordance to any warranty specifications. Taking your Duramax diesel truck back to GM for service also improves its trade-in and re-sale value because you will have a documented service record proving the quality of care your vehicle has had during its time with you. There are several things you can do to maximize the service you get when you take your diesel truck to GM for service.

Qualifications

    Before you take your Duramax diesel to the dealership for servicing, you need to talk to the dealerships service department and make certain that they have a certified Duramax diesel mechanic on staff to work on your trucks engine. Many dealerships and mechanic shops will hire uncertified technicians to do a lot of the minor repair jobs, but if you want the best quality work, you need to make sure everyone who will be touching your vehicle has been officially certified by the National Institute for Automotive Service Excellence (ASE). Uncertified mechanics may not have had the proper training or developed the skills they need to perform proper repairs on your vehicle. Improperly done repairs can lead to a number of different headaches down the road.

    If your nearest GM dealership does not have an ASE or certified diesel mechanic on staff and available to work on your truck, find a different dealership to take your vehicle to. Make sure to document your request for a certified mechanic in the paperwork when you drop your truck off.

Documentation

    Document every communication between yourself and the dealership in writing. When you bring your vehicle in for service, provide the mechanics with a list of problems that you are experiencing to make sure that they are aware of all problems and none will be forgotten during the repair process. Make sure you get a list of every part that was adjusted or changed on your vehicle, as well as information about replacement warranties. Most replacement auto parts come with some form of warranty. If you believe the repair on your vehicle should fall under warranty, read your warranty and bring a copy of it with you when you take your vehicle in for servicing.

Educate Yourself

    The best protection for any diesel truck owner who is bringing a vehicle in for repairs is a solid understanding of how the engine, in this case the Duramax, works and what needs to be repaired. Read your owner manual and any recall information to keep tabs on potential problems.

    A strong understanding of the problem and solution will make you an educated consumer. Being well educated about your truck means you will be able to understand what your mechanic is telling you is wrong with the vehicle as well as the benefits and potential ramifications of repairs. Do not be afraid to ask your mechanic plenty of questions until you can thoroughly grasp the problem.

    Being well educated about your truck will also help you avoid unnecessary work that the dealership may promote in order to increase their profit margin.

Continue reading...

Ball Joint Service Tools

Wednesday, April 2, 2014 | Labels: , , , | 0 comments |
Ball Joint Service Tools

The ball joint, a ball-and-socket arrangement, lets the steering suspension pivot, allowing the vehicle to turn. Similar to a hip ball and socket, the part wears due to the twisting and torquing motion. It also receives a shock load from the vehicles weight. Eventually, ball joints wear out and require replacement. Worn ball joints can cause serious steering binding and front end misalignment. Choosing the correct tools to replace the balls joints can be as important as the replacement parts.

Floor Jack

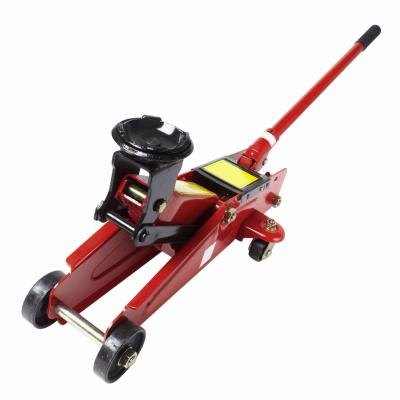
    Use the hydraulic floor jack in place of any professional lift. The 1 1/2-ton or 2-ton lifting capacities have the strength necessary to hoist either end of the vehicle for placement of the jack stands. Floor jacks also support, lower and raise the control arm when you need to relieve pressure. They function as alignment tools to lift the heavy suspension parts back into place.

Jack Stands

    Jack stands provide a level and stable platform for the vehicle while you perform work on the ball joints. They must have sufficient durability to withstand the largest truck bodies, and include safety locking mechanisms that prevent slippage, wobble and accidental drop.

Pickle Fork

    The pickle fork, also known as the ball joint removal tool, allows you to break the seam of the ball joint away from the control arms once you have removed the castellated nuts and cotter pins. Hit on the end with a hammer, they pry a seal open between the metal components. Pickle forks also remove the joint in the outer tie rod end, where you must use force to separate it.

Socket Set and Wrenches

    Complete socket sets and wrenches in the 1/2-inch drive versions perform well when you need to remove the heavy caliper bolts and castellated ball joint nuts. Sockets in the six-point configuration make the best gripping contact for nuts and bolts. Ratchet wrenches with fine-tooth gears work well for confined spaces. Wrenches in the 1/2-inch drive sizes in the combination head design provide more leverage to remove stubborn bolts.

Drill Motors and Air Chisels

    You can sometimes use drill motors with assorted bits to drill out the factory rivets that hold many ball joints in place. Use the correct size drill bit on the top of the rivet head to drill it completely out of the rivet hole. You can also use air chisels with cutting bits to cut off the rivet heads flush at the control arm surface. You can use either tool for removing the rivets.

Pry Bar

    The long-handle pry bar provides adequate leverage to lift or pry the heavy suspension components and to force hubs lose. It also provides leverage strength for lifting the controls arms when you need to align them with ball joint and tie rod connection points.

Snap Ring Pliers

    When four-wheel, front-wheel drive trucks need ball joint replacement, you must use snap ring pliers to remove the retainer ring on the outer hub axle. The tool has a specialized pliers head to fit into slots of the retainer ring.

Hammers

    Use a large rubber mallet when dealing with stuck rotors and other parts that require force and shock to remove or separate them. The rubber head of the mallet provides a cushioning effect that prevents damage to precision machined parts, such as bearing surfaces and rotor faces. Large metal sledge hammers provide the weight and shock necessary to strike the pickle fork, or the tie rod and ball joint heads.

Torque Wrench

    Torque wrenches, measured in foot-lbs., provide the exact tightening pressure required to set the castellated nuts, caliper mount and caliper, and the ball joint mounting bolts. They come in either "click" design wherein a snapping noise signifies the correct pressure, or in the dial indicator design.

Wire Cutters

    Wire cutters come in handy for clipping the cotter pins, attached to the tie rod and ball joint castellated nuts. They also work well for flaring the ends of the cotter pins once you have installed them.

Spring Compressors

    For certain model and make vehicles, you must use spring compressors to compress the springs that fit between the upper control arm and the frame. Used to relieve pressure, the compressors have adjusting nuts that collapse or open the springs via hook-type gripping arms. They function as a safer alternative to the pry bar, which often performs the same job.

Tire Irons

    Tire irons allow you to loosen wheel lug nuts. The star or X-shaped configurations work best for leverage and socket selection.

Continue reading...

How to Clear the Service Engine Soon on a 2002 GMC Truck

Thursday, December 26, 2013 | Labels: , , , , , , , , , , , | 0 comments |
How to Clear the Service Engine Soon on a 2002 GMC Truck

A 2002 GMC truck needs an OBD scan tool to clear the "Service Engine Soon" light. There is a computer within the vehicle called On-Board Diagnostics, or OBD, that monitors the various systems within the vehicle. It also keeps track of when you need routine maintenance. To keep the computer functioning properly so it keeps track of when the maintenance is due, you must use the OBD scan tool to read the code to find out exactly what type of servicing is needed. Then you simply use the tool to reset the light. Make sure you have the servicing performed before you clear the light.

Instructions

    1

    Locate the diagnostic connector port on the drivers side of the vehicle. It is located on the underside of the dashboard, between the center console and the steering column. Plug the OBD scan tool connector end into the diagnostic connector port.

    2

    Put the key into the ignition and turn it to the "on" position. This will power the scan tool on. Make sure you dont turn the key too far and start the engine.

    3

    Wait for the code to appear on the screen of the scan tool then press "Erase." If you are prompted by the question "Are you sure?," press "Yes." This clears the codes and you should see the "Service Engine Soon" light disappear from the instrument cluster. Unplug the scan tool and turn off the vehicle.

    4

    Turn the engine on and check to see that the "Service Engine Soon" light is still off.

Continue reading...

How to Turn Off the Service Light on a 1998 Volvo S70

Sunday, December 15, 2013 | Labels: , , , , , , , , , , , | 0 comments |
How to Turn Off the Service Light on a 1998 Volvo S70

The On-Board Diagnostics computer on your 1998 Volvo S70 receives trouble codes from sensors throughout the vehicle. It also keeps track of when your car needs regular maintenance such as oil changes and tune-ups. When the service light shows up on your instrument panel, its time for a servicing. Service the car before manually resetting and turning off the service engine light. Its a quick fix on a Volvo, requiring no special tools and only a few moments of your time.

Instructions

    1

    Sit in the drivers seat and put the ignition key in, turning the key to the first position. Make sure the engine doesnt start, though.

    2

    Find the trip odometer knob and push it in, holding it down while you turn the key in the ignition to the second position. This is the position right before the engine starts.

    3

    Watch the instrument panel and look for the service engine light to flash. After it flashes three or four times, turn the key in the ignition back to the first position. Make sure you are still holding the trip odometer button down.

    4

    Let the trip button go and turn on the engine. Notice whether or not the service engine light has turned off. If it hasnt turned off, repeat the procedure.

Continue reading...

Service Torque Converter Procedures

Saturday, November 23, 2013 | Labels: , , , | 0 comments |
Service Torque Converter Procedures

A cars engine needs a pathway, as well as a power amplifier, to move torque from the engine to the transmission, which propels a vehicle forward. A torque converter is the device that provides this.

Identification

    The torque converter is situated between the engine and transmission. It functions as a multiplier for the power generated from the engine to the motion of the transmission. It also helps muffle vibration from the drivetrain and engine components.

Features

    The torque converter is a completely sealed assembly, which does not allow for any maintenance or servicing. But there is a way to test it called a stall test. Turn the car on and make sure the parking brake is engaged, as well as securing the wheels by chocking them. Press both the brake and accelerator pedal down together and see what RPM the car reaches. Check the typical RPM the vehicle usually achieves with the vehicle manufacturer. If it is lower than mandated, the torque converter may be slipping.

Warning

    This stall test tends to put strain on the transmission. It is recommended to only perform this test in five second intervals.

Continue reading...

How to Get Reimbursed on Nissan Extended Service

Wednesday, November 20, 2013 | Labels: , , , , , , , | 0 comments |

Nissan Extended Service, also known as Nissan Extended Warranty, is an extended warranty you can buy for your vehicle after your manufacturers warranty expires. It protects you when you need to repair your vehicle. When you need repairs, you pay the deductible (which depends on your plan) and any parts not covered by your plan, then Nissan pays the remaining amount directly to the repair facility. If you wish to cancel your Nissan Extended Service and are reimbursed for it, you can do so at your local Nissan dealership.

Instructions

    1

    Go to your local Nissan dealership.

    2

    Get a Cancellation Request form from the dealership.

    3

    Fill out the form, sign it and have your Nissan dealer sign it. Include the date and mileage on your car.

    4

    Mail the form to Nissan Extended Services North America, P.O. Box 685004, Franklin, TN, 37068-5004. Wait four to six weeks for the form to be processed; the refund will be sent to the address you provide on the form.

Continue reading...

How to Reset the Oil Service on a Mini

Tuesday, November 5, 2013 | Labels: , , , , , , , , | 0 comments |
How to Reset the Oil Service on a Mini

The Mini Cooper or "Mini," made by BMW, comes standard with a Service Interval Display or SID. This keeps track of when the next oil change is needed. It can be found near the odometer on the instrument panel. You should have the oil changed first before you attempt to manually reset the light or else it will keep turning back on. Its an easy fix requiring no special tools and just a few minutes of time.

Instructions

    1

    Put the key into the ignition. Locate the trip odometer button and press and hold it in. At the same time, turn the key in the ignition to the "I" position. Look for the message "51A" just left of the mileage on the instrument panel.

    2

    Release the button and wait for three seconds. Press and hold the trip button again and wait about five seconds. Look for the message "RST" next to the mileage counter. Once you see this message, release the trip button.

    3

    Press in the trip button again and wait for the message "15000" to show up. Once you see this message, release the button and turn off the vehicle. The oil light should now turn off.

    4

    Turn off the vehicle and wait one minute. Turn on the engine and verify on the instrument panel that the check oil light has remained off.

Continue reading...

How to Close a Hydraulic Service Jack

Wednesday, September 11, 2013 | Labels: , , , , , , | 1 comments |
How to Close a Hydraulic Service Jack

Hydraulic jacks come in two basic styles, floor jacks and bottle jacks. Bottle jacks consist of a simple hydraulic ram oriented vertically on a small base with a lifting saddle mounted on top of the ram. Floor jacks are somewhat larger, with a frame that mounts the hydraulic ram horizontally under a lifting arm. Both types of jack operate by applying hand pressure at the handle socket, which produces hydraulic pressure and extends the ram. Release pressure from the ram to close the jack by turning the release screw to bleed off the pressure in the ram.

Instructions

Bottle Jack

    1

    Remove the handle from the handle socket.

    2

    Engage the slots in the end of the handle with the studs on the release screw located on the base plate at the bottom of the ram. Slowly rotate the release screw at the bottom of the jack counterclockwise until the jack collapses. Push down on the lifting saddle by hand if the jack will not collapse fully on its own.

    3

    Rotate the release screw clockwise until the screw bottoms out.

    4

    Disengage the handle from the release screw.

Floor Jack

    5

    Slowly rotate the lifting handle counterclockwise until the jack collapses.

    6

    Push down on the lifting saddle by hand, if the jack will not collapse fully on its own.

    7

    Rotate the lifting handle clockwise until you feel firm resistance to rotation.

Continue reading...