Showing posts with label reset. Show all posts

How to Reset the Airbag Computer on a 96 Dodge Caravan

Monday, May 19, 2014 | Labels: , , , , , , , , , , | 0 comments |
How to Reset the Airbag Computer on a 96 Dodge Caravan

You can reset the airbag or SRS (Supplemental Restraint System) computer on your 1996 Dodge Caravan right from your home garage, saving yourself time and money. The On-Board Diagnostics computer stores trouble codes from sensors positioned throughout the vehicle. The Caravan alerts you to an airbag malfunction by illuminating the SRS light on the instrument panel. If you see this light, stop the vehicle and have it towed to your mechanic.


Once the airbag has been examined and replaced, you can reset the computer using a diagnostic reset tool. This is a small hand-held device sold at all auto parts retailers.

Instructions

    1

    Locate the fuse panel cover under the steering column. Open the cover by turning the knob and pulling down.

    2

    Find the open port in the fuse panel that is the same size and shape as the diagnostic reset tool connector end. Plug this tool into the port.

    3

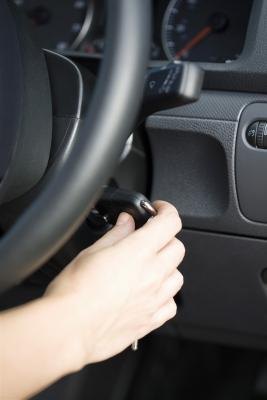
    Put the key into the ignition and turn it to the "II" position but dont start the engine. Wait for the light to stop blinking on the reset tool. Once it has stopped flashing, the airbag computer will be reset.

Continue reading...

How to Reset a Factory Radio Amp in a 1999 Jeep Cherokee Laredo

Tuesday, April 1, 2014 | Labels: , , , , , , , , , , , | 0 comments |

The factory radio amp in a 1999 Jeep Cherokee Laredo provides extra power to the radio unit to drive the speakers at higher volume levels. In addition to powering the speakers at high volume levels, the amp makes the sound clearer at all volume levels. Occasionally, the amp can draw too much power, causing its integrated reset switch to trip. This switch is designed to prevent the amp from overheating and causing a fire or damaging its internal components. When this switch trips, it needs to be reset directly on the amp itself; there is no external or dash-mounted reset switch.

Instructions

    1

    Open the back seat door, and pull the release strap on the bottom of the rear seat.

    2

    Fold the rear seat cushion forward to expose the carpeting underneath.

    3

    Peel back the carpet under the left side of the seat to expose the amplifier.

    4

    Depress the reset switch on the front side of the amplifier, and then replace the carpet.

    5

    Fold the rear seat back down so the seat cushion locks into place. Test the radio to make sure that it functions properly.

Continue reading...

How to Reset the Engine Light in a Jeep

Monday, March 17, 2014 | Labels: , , , , , , , , | 0 comments |
How to Reset the Engine Light in a Jeep

The check engine light on your Jeep will illuminate on the instrument panel when the on-board diagnostics computer receives an error code from a sensor, telling you that something is not working correctly on the vehicle. Although this light is annoying, make sure you take your vehicle to a mechanic to have the trouble code read and the problem repaired before you shut off the light. Once the problem has been fixed, then it will only take you a few minutes at home to reset the light.

Instructions

    1

    Find the port under the drivers dashboard that fits the code scanner connector. Plug the scanner into the port, and turn the key in the ignition to the "On" position but dont let the engine start. This will cause the scanner to turn on.

    2

    Use the arrow keys on the scanner to select "Reset" or "Erase." The check engine light will turn off on the instrument panel.

    3

    Unplug the scanner, and turn off the vehicle. Wait 10 seconds then turn the engine on. Verify that the check engine light is still off.

Continue reading...

How to Reset a Trouble Code on a 1993 Volvo 850

Monday, January 27, 2014 | Labels: , , , , , , , , , | 0 comments |
How to Reset a Trouble Code on a 1993 Volvo 850

You can reset the trouble codes on your 1993 Volvo 850 right from your home garage, saving time and money. The On-Board Diagnostics I computer (OBD I) receives and stores trouble codes sent to it from sensors positioned throughout the car. The computer alerts you to any malfunction or service need by illuminating a warning or service light on the instrument panel. After the scan tool reads the codes, and after you have had the vehicle serviced or repaired, then you or your mechanic can reset the trouble codes by using the same OBD I scan tool.

Instructions

    1

    Located a port on the lower part of the drivers side dashboard near the hood release handle. This port should be the same size and shape as the connector on the OBD I scan tool. Plug the scan tool into this port.

    2

    Put the key into the ignition and turn it to the "On" position, but dont start the engine. This will turn on the scan tool.

    3

    Wait for the scan tool to read the trouble codes. Look for a command that says "Delete Codes" or a similar command. Select this command. Wait for the scan tool to complete the task. It will indicate that it has finished by displaying "Command Sent" or it will return you to the main menu. Scan tools vary a bit according to which company manufactured it.

    4

    Unplug the scan tool and turn on the engine. Verify that all warning and service lights have shut off of the instrument panel.

Continue reading...

How to Reset the Computer on a 1997 Volkswagen Passat

Monday, November 18, 2013 | Labels: , , , , , , , , , | 0 comments |

When it comes to resetting computers, many people believe that you can simply disconnect the vehicles battery and the computer will be automatically reset. This, however, is not the case with modern vehicles and computer systems, including the 1997 Volkswagen Passat. In these vehicles, the engine control unit, or ECU, has an internal battery that maintains memory power to keep track of all the settings, trouble codes, and other data. The proper way to reset the computer is to clear all of the trouble code data from its memory with a scan tool or code reader.

Instructions

    1

    Shut down the engine, but leave the ignition switch in the ON position. If you turn the ignition switch completely off, the scan tool will not be able to communicate with ECU.

    2

    Locate the data link connector, or DLC, under the dashboard near the hood-release latch. Plug the open end of the scan tools cable into the DLC. Make sure that it is completely seated so it doesnt come loose in the middle of clearing the codes.

    3

    Turn on your scan tool and enter any information that it asks for. Typically, youll need to enter the year, make, model, transmission type, and engine size of your vehicle.

    4

    Use the menu keys to navigate to the diagnostic trouble code, or DTC menu. Each scan tool, depending upon its manufacturer, has a different menu layout. You DTC menu may be called something like Codes or Trouble Codes. Either way, the idea is the same.

    5

    Choose the option to erase the trouble codes from the ECUs memory. Select Yes or OK if the scan tool asks you if youre sure you want to clear the codes. Most scan tools will ask you this to avoid accidentally clearing the diagnostic data. Disconnect the scan tool once the screen confirms the codes have been erased and the computer is reset.

Continue reading...

How to Reset the Change Oil Message on a 2008 Jeep Liberty

Saturday, November 9, 2013 | Labels: , , , , , , , , , , , | 0 comments |
How to Reset the

You can reset the change oil message on your 2008 Jeep Liberty right in your garage, saving time and money. The Liberty keeps track of your oil changes and alerts you to when the next one is due. A light illuminates on the instrument panel to alert you to the need for an oil change. Usually your mechanic will reset the light, but not always. If you change the oil change yourself, you will need to know how to reset it.

Instructions

    1

    Put the key in the ignition and turn it to the "On" position, but dont start the engine.

    2

    Press the accelerator to the floor very slowly three times within ten seconds. Turn off the ignition.

    3

    Turn the key in the ignition to the "On" position again. The "Change Oil" light should now be off. If its still illuminated, repeat the above procedure.

Continue reading...

How to Reset the Oil Service on a Mini

Tuesday, November 5, 2013 | Labels: , , , , , , , , | 0 comments |
How to Reset the Oil Service on a Mini

The Mini Cooper or "Mini," made by BMW, comes standard with a Service Interval Display or SID. This keeps track of when the next oil change is needed. It can be found near the odometer on the instrument panel. You should have the oil changed first before you attempt to manually reset the light or else it will keep turning back on. Its an easy fix requiring no special tools and just a few minutes of time.

Instructions

    1

    Put the key into the ignition. Locate the trip odometer button and press and hold it in. At the same time, turn the key in the ignition to the "I" position. Look for the message "51A" just left of the mileage on the instrument panel.

    2

    Release the button and wait for three seconds. Press and hold the trip button again and wait about five seconds. Look for the message "RST" next to the mileage counter. Once you see this message, release the trip button.

    3

    Press in the trip button again and wait for the message "15000" to show up. Once you see this message, release the button and turn off the vehicle. The oil light should now turn off.

    4

    Turn off the vehicle and wait one minute. Turn on the engine and verify on the instrument panel that the check oil light has remained off.

Continue reading...

How do I Reset Ingersol Air Compressor After E Stop

Monday, November 4, 2013 | Labels: , , , , , , , , , | 0 comments |

In 1871, the Ingersoll Rand Co. started producing industrial tools and power equipment. Today, the company offers industrial equipment, climate control systems, security solutions, home products and power tools. Ingersoll Rand air compressors utilize safety systems to prevent personal injury and equipment damage. The "Emergency Stop" function on an Ingersoll Rand air compressor allows the operator to quickly shut down the system in an emergency. You need to reset the air compressor after engaging the "E-Stop" button before using the equipment again.

Instructions

    1

    Examine the control panel for the air compressor and locate the circular "EMEG STOP" button.

    2

    Rotate the "EMEG STOP" button clockwise.

    3

    Press the "RESET" button located on the control panel twice. After resetting the system, press the "Start" button to engage the air compressor.

Continue reading...

How to Reset an Audi Airbag Light

Saturday, November 2, 2013 | Labels: , , , , , , | 0 comments |
How to Reset an Audi Airbag Light

You can reset the SRS or airbag light on your Audi using an OBD diagnostic tool. This can be purchased from an auto parts retailer. The OBD diagnostic tool can read the trouble codes from the vehicles On-Board Diagnostics (OBD) computer. Then, after you have repaired the vehicle, you can also reset and clear the light from the instrument panel using this same tool. If you dont wish to purchase one, you can borrow one from most auto parts stores for free. Usually the mechanic who repairs your Audi will reset the light, but not always.

Instructions

    1

    Park on flat, level ground. Look for the OBD II port near the hood release on the Audi. The OBD II port is also known as the OBD II interface or diagnostic port. Once you locate it, connect it to the OBD tool.

    2

    Put the key into the ignition and turn the vehicle to the "on" position. Look on the face of the diagnostic tool and wait for the trouble codes to display. Look for the "Delete" button or menu command and press it to delete the codes and reset the SRS light.

    3

    Unplug the OBD diagnostic tool from the port and turn off the vehicle. Wait one minute.

    4

    Turn on the engine and examine the instrument panel to make sure the SRS or airbag light has turned off.

Continue reading...

How to Reset a 1992 Toyota Engine Light

Thursday, October 24, 2013 | Labels: , , , , , , , | 0 comments |
How to Reset a 1992 Toyota Engine Light

The appearance of the "Check Engine" light on your 1992 Toyota indicates there is a problem with your vehicles engine, exhaust or fuel systems. The vehicle needs to be inspected by a qualified mechanic before you reset the engine light yourself. After any needed repairs have been completed, resetting the Toyotas On-Board Diagnostics computer will turn off the check engine light. All you need is an OBD scanning tool that reads the trouble codes and erases them from the OBD computer.

Instructions

    1

    Locate and open the fuse panel cover which is located under the steering column. Use your fingers to open it by pulling down on it from the top.

    2

    Look for an open port inside the fuse panel that is the same shape and size as the connector end on the OBD scanning tool. Once you have located this, plug the OBD scanning-tool connector into the port.

    3

    Put the key into the ignition and turn it on, but do not start the engine. This will power on the OBD scanning tool; you dont need to turn the tool on manually.

    4

    Wait for the display on the OBD scanning tool to read "OK." Press "Clear" on the OBD scanning tool to turn off the check engine light.

    5

    Unplug the scanning tool from the port and put the fuse panel cover back in place. Turn the vehicle off, wait a minute, then start the engine. Look at the instrument cluster to make sure the check engine light has turned off for good.

Continue reading...

How to Reset the Security Code for Your Radio in a 2001 Mitsubishi Galant

Tuesday, October 22, 2013 | Labels: , , , , , , , , , , , , , | 0 comments |
How to Reset the Security Code for Your Radio in a 2001 Mitsubishi Galant

As a theft deterrent system, Mitsubishi programs its car radios with a 4-digit code that locks the audio system when tampered with. Trouble is that sometimes the system locks up even on legitimate owners, leaving them without the ability to play compact discs or use the radio.


If you see a prompt that reads "Code," dont sweat it, the user manual should contain a reset code. If no manual is available, Mitsubishi hosts a website which will send you the code as long as you have your vehicles VIN and the radios model and serial numbers.

Instructions

Locate and reset the lock code

    1

    Locate 2001 your original Galant owners manual. Note that it must be the one that came with your vehicle; replacement manuals will not have the appropriate code.

    2

    Insert key into ignition and set to "ON" or "RUN" position. Turn on radio.

    3

    Enter 4-digit code that appears in owners manual by depressing preset buttons on the radio deck.

Continue reading...

How to Reset a 2002 Honda Accord SRS Light

Sunday, October 6, 2013 | Labels: , , , , , , , , | 0 comments |
How to Reset a 2002 Honda Accord SRS Light

When you see the SRS light on your 2002 Honda Accords dashboard, this is an indication that there is a problem with the airbag assembly. Considering this is a very important safety feature of your vehicle, you should have a mechanic look at it at once. Usually a mechanic will reset the light for you. But if the mechanic doesnt reset it, you can do it yourself at home. Or if you ever disconnect your battery, this can cause the SRS light to go on.

Instructions

    1

    Locate the fuse panel cover under the steering column. Open the cover by pulling down on it from the top.

    2

    Remove the yellow SRS plug from the fuse box.

    3

    Straighten the paper clip. Touch the end of the paper clip to each of the SRS terminals. Watch the SRS light on the dashboard until it goes out.

    4

    Remove the paper clip and put the SRS plug back in place. Close the fuse panel cover.

Continue reading...

How to Reset the SRS Light on a Honda CRV

Saturday, October 5, 2013 | Labels: , , , , , , , , , | 0 comments |
How to Reset the SRS Light on a Honda CRV

A Honda CRV comes with an On-Board Diagnostics computer that keeps track of all the mechanical functions of the vehicle. When you see the SRS light flash on your instrument panel, it is alerting you to a malfunction in the Supplemental Restraint System, i.e., the airbag system. You should have it examined and repaired immediately to prevent an accidental airbag deployment.

Instructions

    1

    Put on safety goggles and cloth work gloves.

    2

    Find the MES connector under the steering wheel near the fuse box. It is generally green or yellow and has a two-hole holder plug in its place. Remove the plug.

    3

    Strip the ends of both wires using a knife. Put one end of each of the wires into each of the holes of the MES connector.

    4

    Cross the other ends of each of the wires together so that they establish contact. This will short out the MES. Take care not to touch the exposed wire with any part of your body.

    5

    Put the key in the ignition and turn it on, but dont start the engine. Keep the ends of the wire touching while you do this. The SRS light will flash on, and then disappear. Separate the wires immediately. The SRS light should come on again.

    6

    Repeat Step 3 and the SRS light will blink twice and turn off. Unshort the two wires. This will cause the SRS light to blink twice.

    7

    Turn off the vehicle, wait a minute and start the engine. The SRS light will illuminate once more, and then go off for good.

Continue reading...

How to Reset 2002 Buick Century Airbags

Friday, September 27, 2013 | Labels: , , , , , , | 0 comments |
How to Reset 2002 Buick Century Airbags

Your 2002 Buick Century, like most modern cars, has a computer system known as the On-Board Diagnostic to identify malfunctions. It also keeps track of the regular maintenance needs of the vehicle. When you see the SRS light illuminate on the instrument panel, this is to alert you to a malfunction with the Supplemental Restraint System or airbag system. Do not drive the vehicle; have it looked at by a professional mechanic as soon as possible. Once the Buick has been repaired, you or your mechanic will need to reset the airbag light. To do this, you need an OBD II scan tool.

Instructions

    1

    Put the key into the ignition and turn it to the "Run" position, but dont crank the engine.

    2

    Locate the diagnostic port under the steering column and plug the OBD II scan tools connector into this port. Wait while the scan tool powers on. Some scan tools need to be manually turned on. If so, look for the "on/off" switch and turn it on.

    3

    Select the "Read Codes" command on the scan tool and then "Clear Codes." Wait while the scan tool clears the SRS code. The scan tool will either return to the main menu or display the word "OK."

    4

    Unplug the scan tool and start the engine. Verify that the SRS light has shut off of the instrument cluster. If so, the vehicle is safe to drive.

Continue reading...

How to Reset the Warning Light on a 2005 Jeep Grand Cherokee Laredo

Wednesday, September 18, 2013 | Labels: , , , , , , , , , , , , | 0 comments |
How to Reset the Warning Light on a 2005 Jeep Grand Cherokee Laredo

A warning light can be reset and turned off in your 2005 Jeep Grand Cherokee Laredo. The on-board diagnostics computer receives error codes from sensors positioned throughout the vehicle. There are various types of warning lights in the Laredo, including ones for the anti-lock braking system, the engine and the supplemental restraint system. Whatever the warning light, you can quickly and easily reset the light yourself right from your home garage using a tool that can be purchased from your local auto parts retailer.

Instructions

    1

    Find a port under the dashboard on the drivers side. Examine the port to make sure its the same size and shape as the code scanner connector. Plug the code scanner into the port. The Laredos battery will automatically power on the scanner.

    2

    Examine the menu on the code scanner. It will display the error codes corresponding to the warning lights on your instrument panel. Unplug the code scanner.

    3

    Fix the problem or perform the maintenance that generated the code.

    4

    Reinsert the scanner in the port. Look for the "Delete" or "Erase" button on the faceplate of the scanner. If there isnt one, scroll through the menu using the arrow keys. Select the "Erase Codes" function. Wait for the main menu to return.

    5

    Put the key in the ignition and start the engine. Examine the instrument panel to make sure the warning light has gone off.

Continue reading...

How to Reset the Check Engine Light on a 2000 Volvo S80

Sunday, September 8, 2013 | Labels: , , , , , , , , , , , | 0 comments |
How to Reset the Check Engine Light on a 2000 Volvo S80

The Volvo S80 is a midsize sedan that made its debut in 1998. You can reset the "Check Engine" light on your 2000 Volvo S80 right from home, using an OBD II scan tool. These tools can be purchased at any auto parts store. Make sure to read the codes first and make any necessary repairs before attempting to reset the light. Doing so prematurely may damage the engine or computer. The On-Board Diagnostics II computer receives error codes from the engine and emissions system and the computer, in turn, illuminates the "Check Engine" light on your instrument cluster.

Instructions

    1

    Put the key into the ignition and turn it to the "On" position. Dont start the engine.

    2

    Plug the OBD II scan tool into the diagnostic port on the drivers side dashboard. This can be found under the steering column.

    3

    Wait for the scan tool to read the codes. Navigate through the menu on the scan tool using the arrow keys. Find a command that says "Delete Codes" or something similar. Select this command.

    4

    Wait for the scan tool to return to the main menu. Unplug the scan tool from the port and start the vehicle. Check to make sure that the "Check Engine" light has shut off.

Continue reading...